What is Google Authenticator?
Google Authenticator is a handy tool for generating dynamic passwords every 30 seconds to enhance your account security. The code can be used for security verification of login, withdrawal, and changing security settings. Here’s how to set up:
Step 1: Go to https://kai.com/ and log in to your account. Then Click on "Personal Center" at the top right
corner and then select "Security Center."
Step 2: Click on "Settings" next to "Google Authenticator."
Step 3:
Follow the on-screen instructions carefully. Enter your account security password and the 6-digit verification code displayed on Google Authenticator to finish the setup. If you've completed SMS two-factor authentication, you'll need to enter your account security password, Google verification code, and SMS verification code together.
Click "Submit" to complete the binding process of the Google verification code.
(Note: Keep your Google Authenticator Key safe in case you need to replace the binding due to a phone change or loss.)
Additional Information:
1.Some Android phones might not have Google Play pre-installed. You can download "Google Installer" to
install Google Services Framework. 2.If Google Play is not available on your phone, use the "Manual Input"
option to enter the verification code manually.
3. Google Authenticator may need camera authorization upon opening the app.
4.In some cases, a phone reboot might be necessary to enable Google Play.
5.Once two-factor authentication is activated, you'll need the verification code for logging in, asset withdrawal, and generating withdrawal addresses.
Lost Your Google Verification Code?
It's crucial to save your secret key or QR code when setting up Google verification. If you forget them, reach out to online customer service for assistance.
How to set up Google Authenticator in the app
1. Access the Account Security Settings 1. Open the exchange app and go to the homepage.
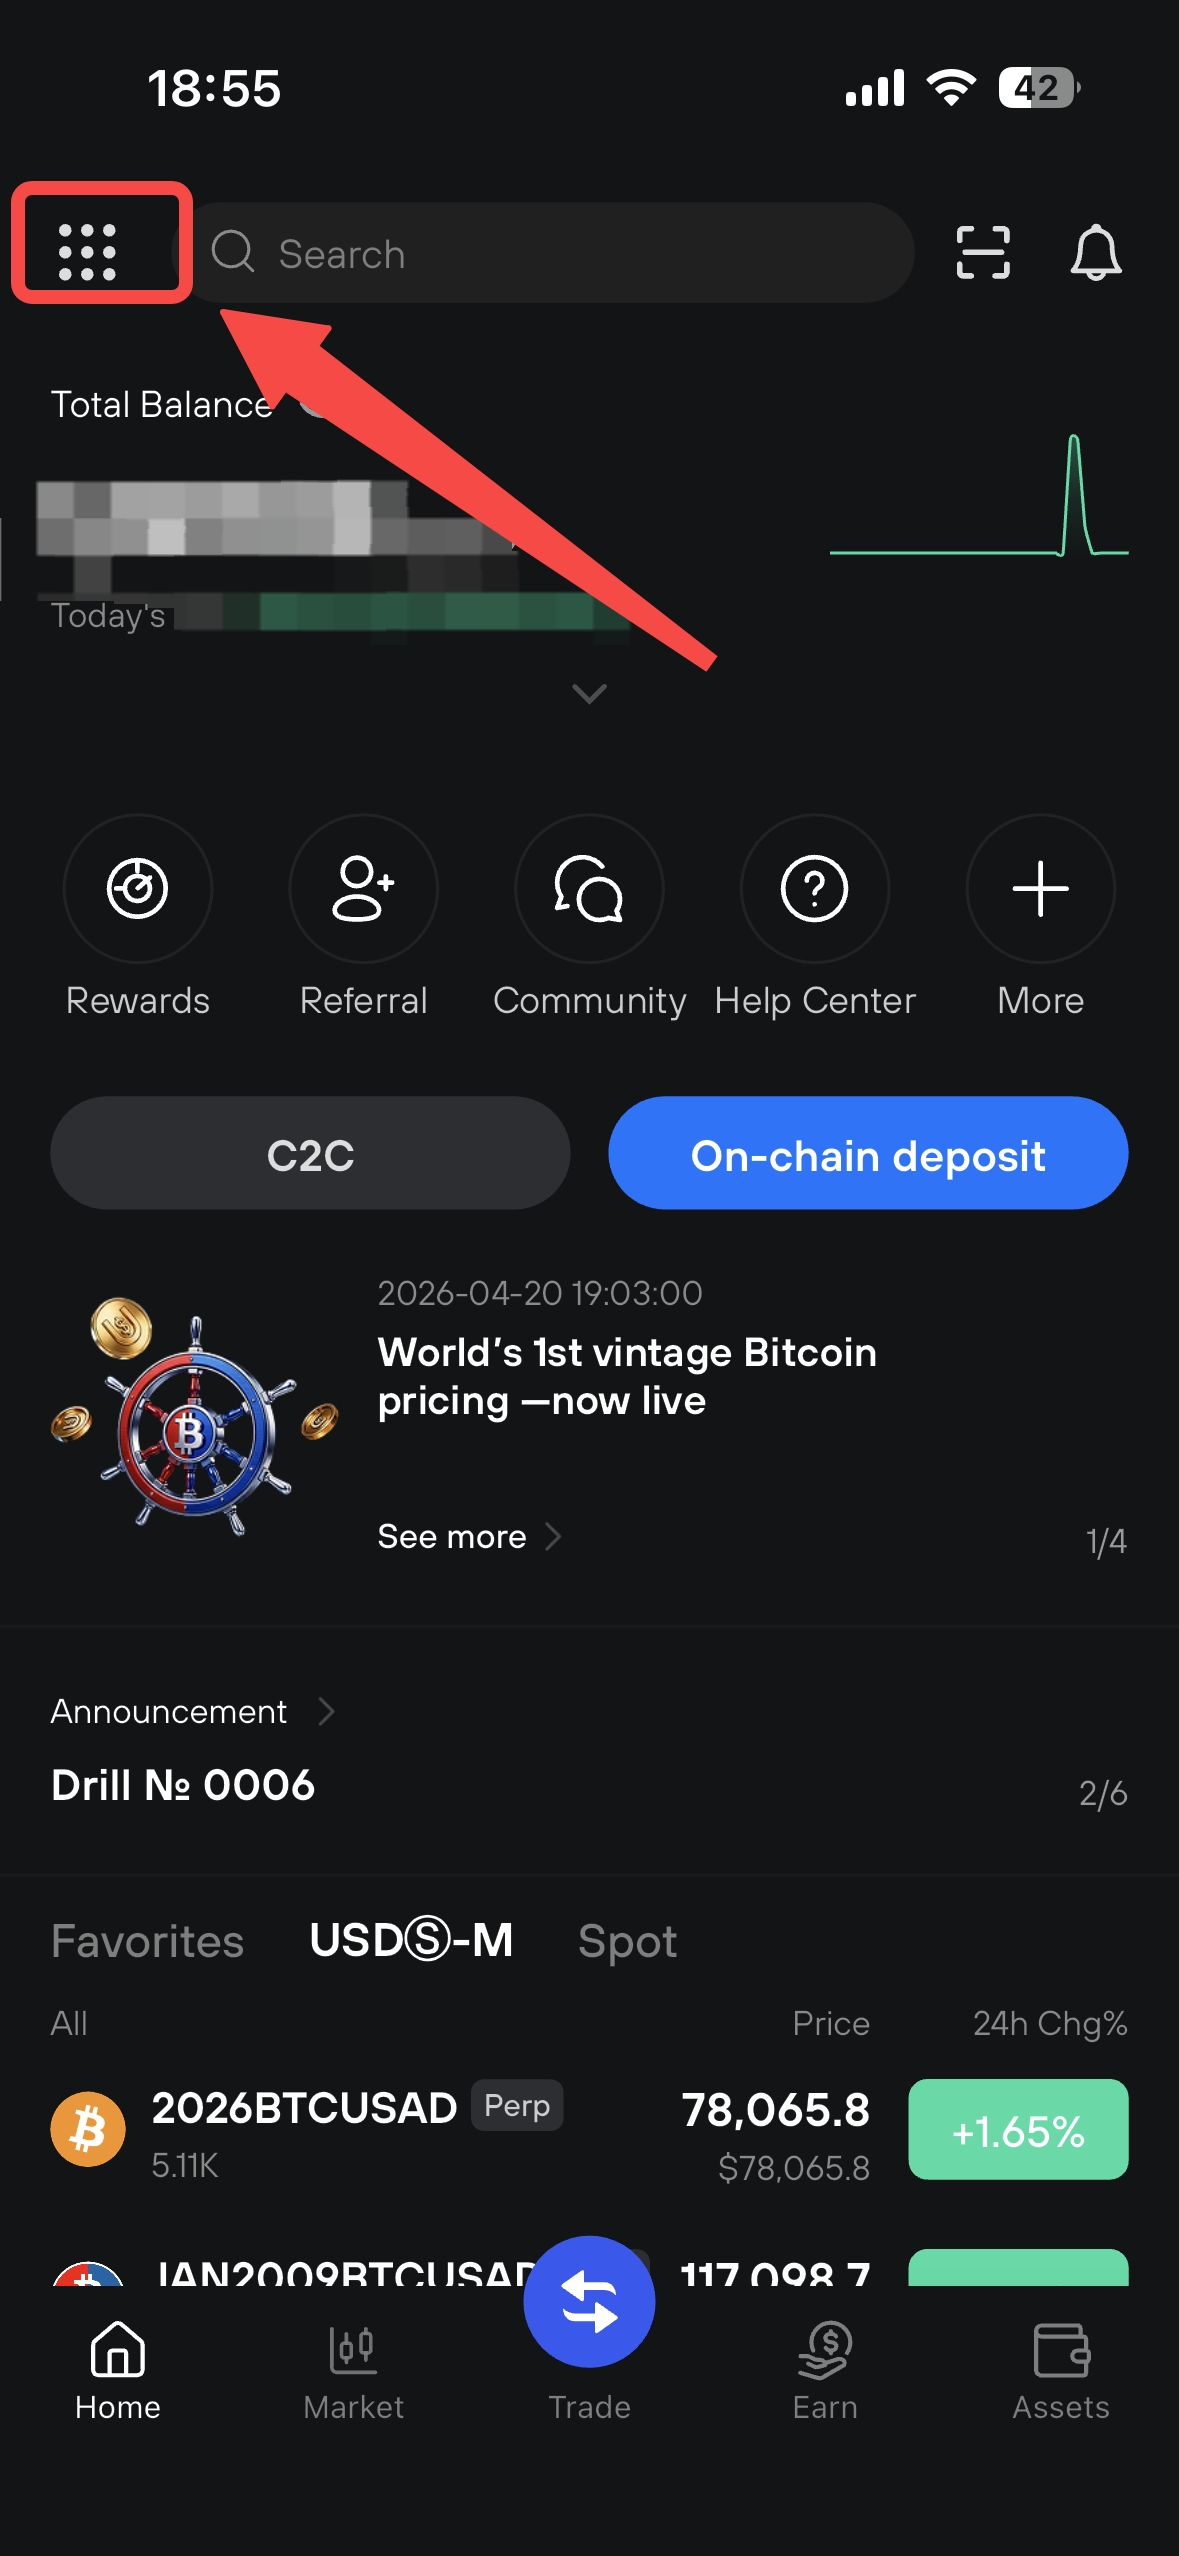
1. Tap the grid menu button in the top-left corner (the icon highlighted in the red box in the screenshot) to enter the function list page.
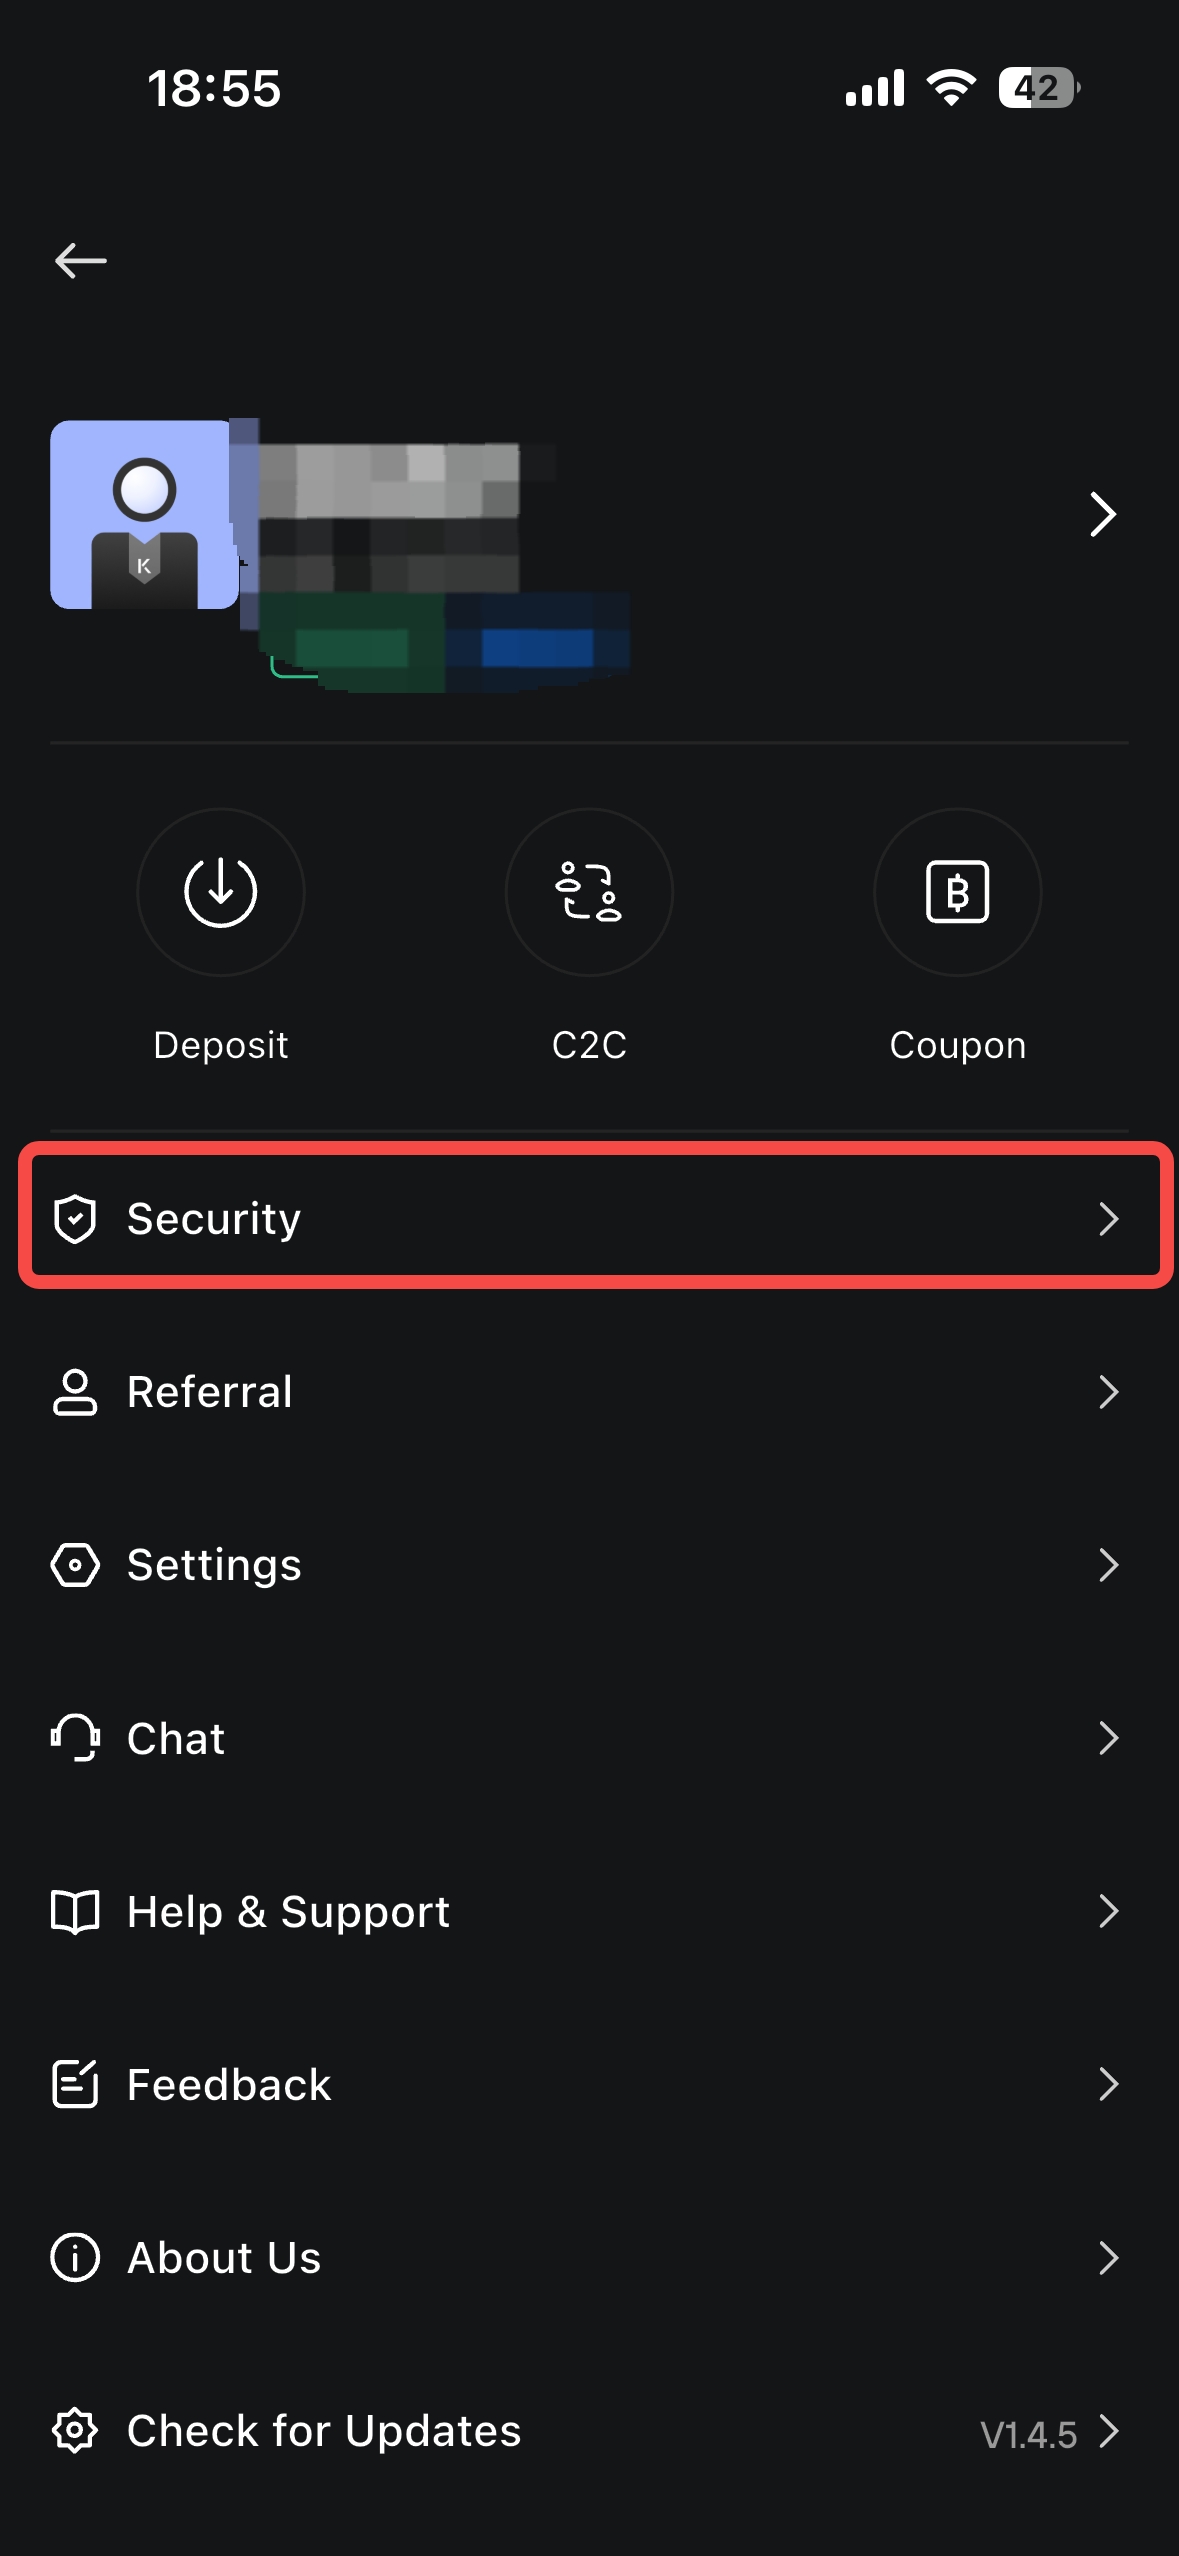
2. From the menu list, find and tap "Account Security" (the option highlighted in the red box in the screenshot) to access the account security management page
2. Locate the Google Authenticator Settings
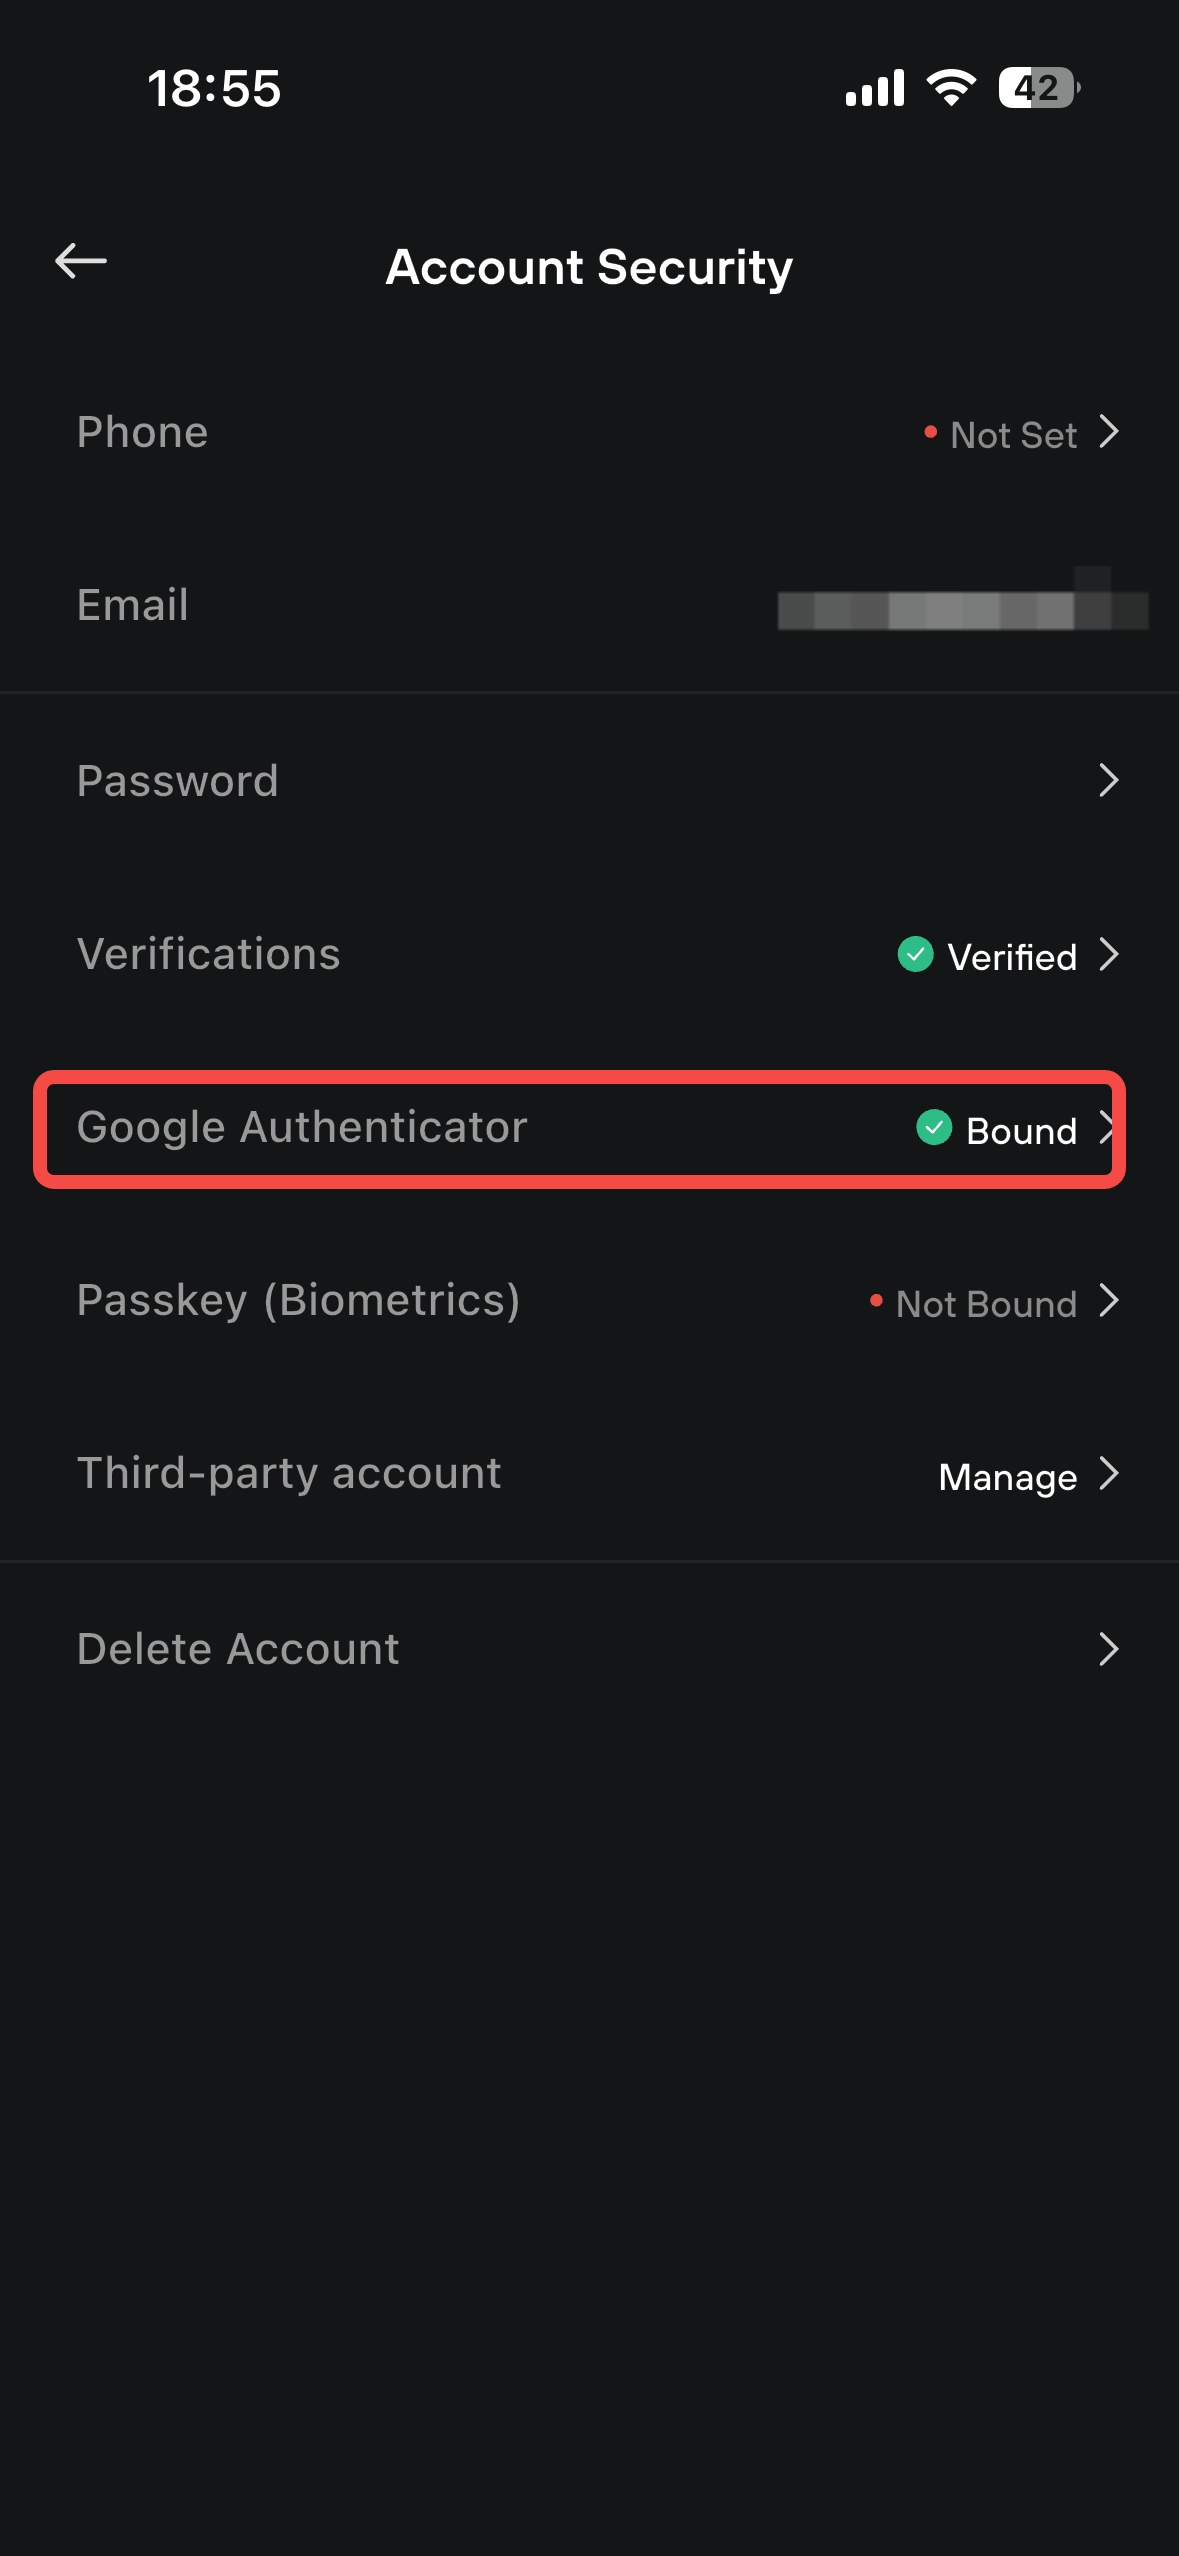
Once on the Account Security page, you'll see various security options. Find the "Google Authenticator" section. • If it shows "Unbound", the feature hasn't been enabled yet. If it shows "Bound", you've already completed the setup and can skip the following steps. Tap the "Google Authenticator" option to enter the setup guide page.
3. Understand the Benefits and Enable Google Authenticator
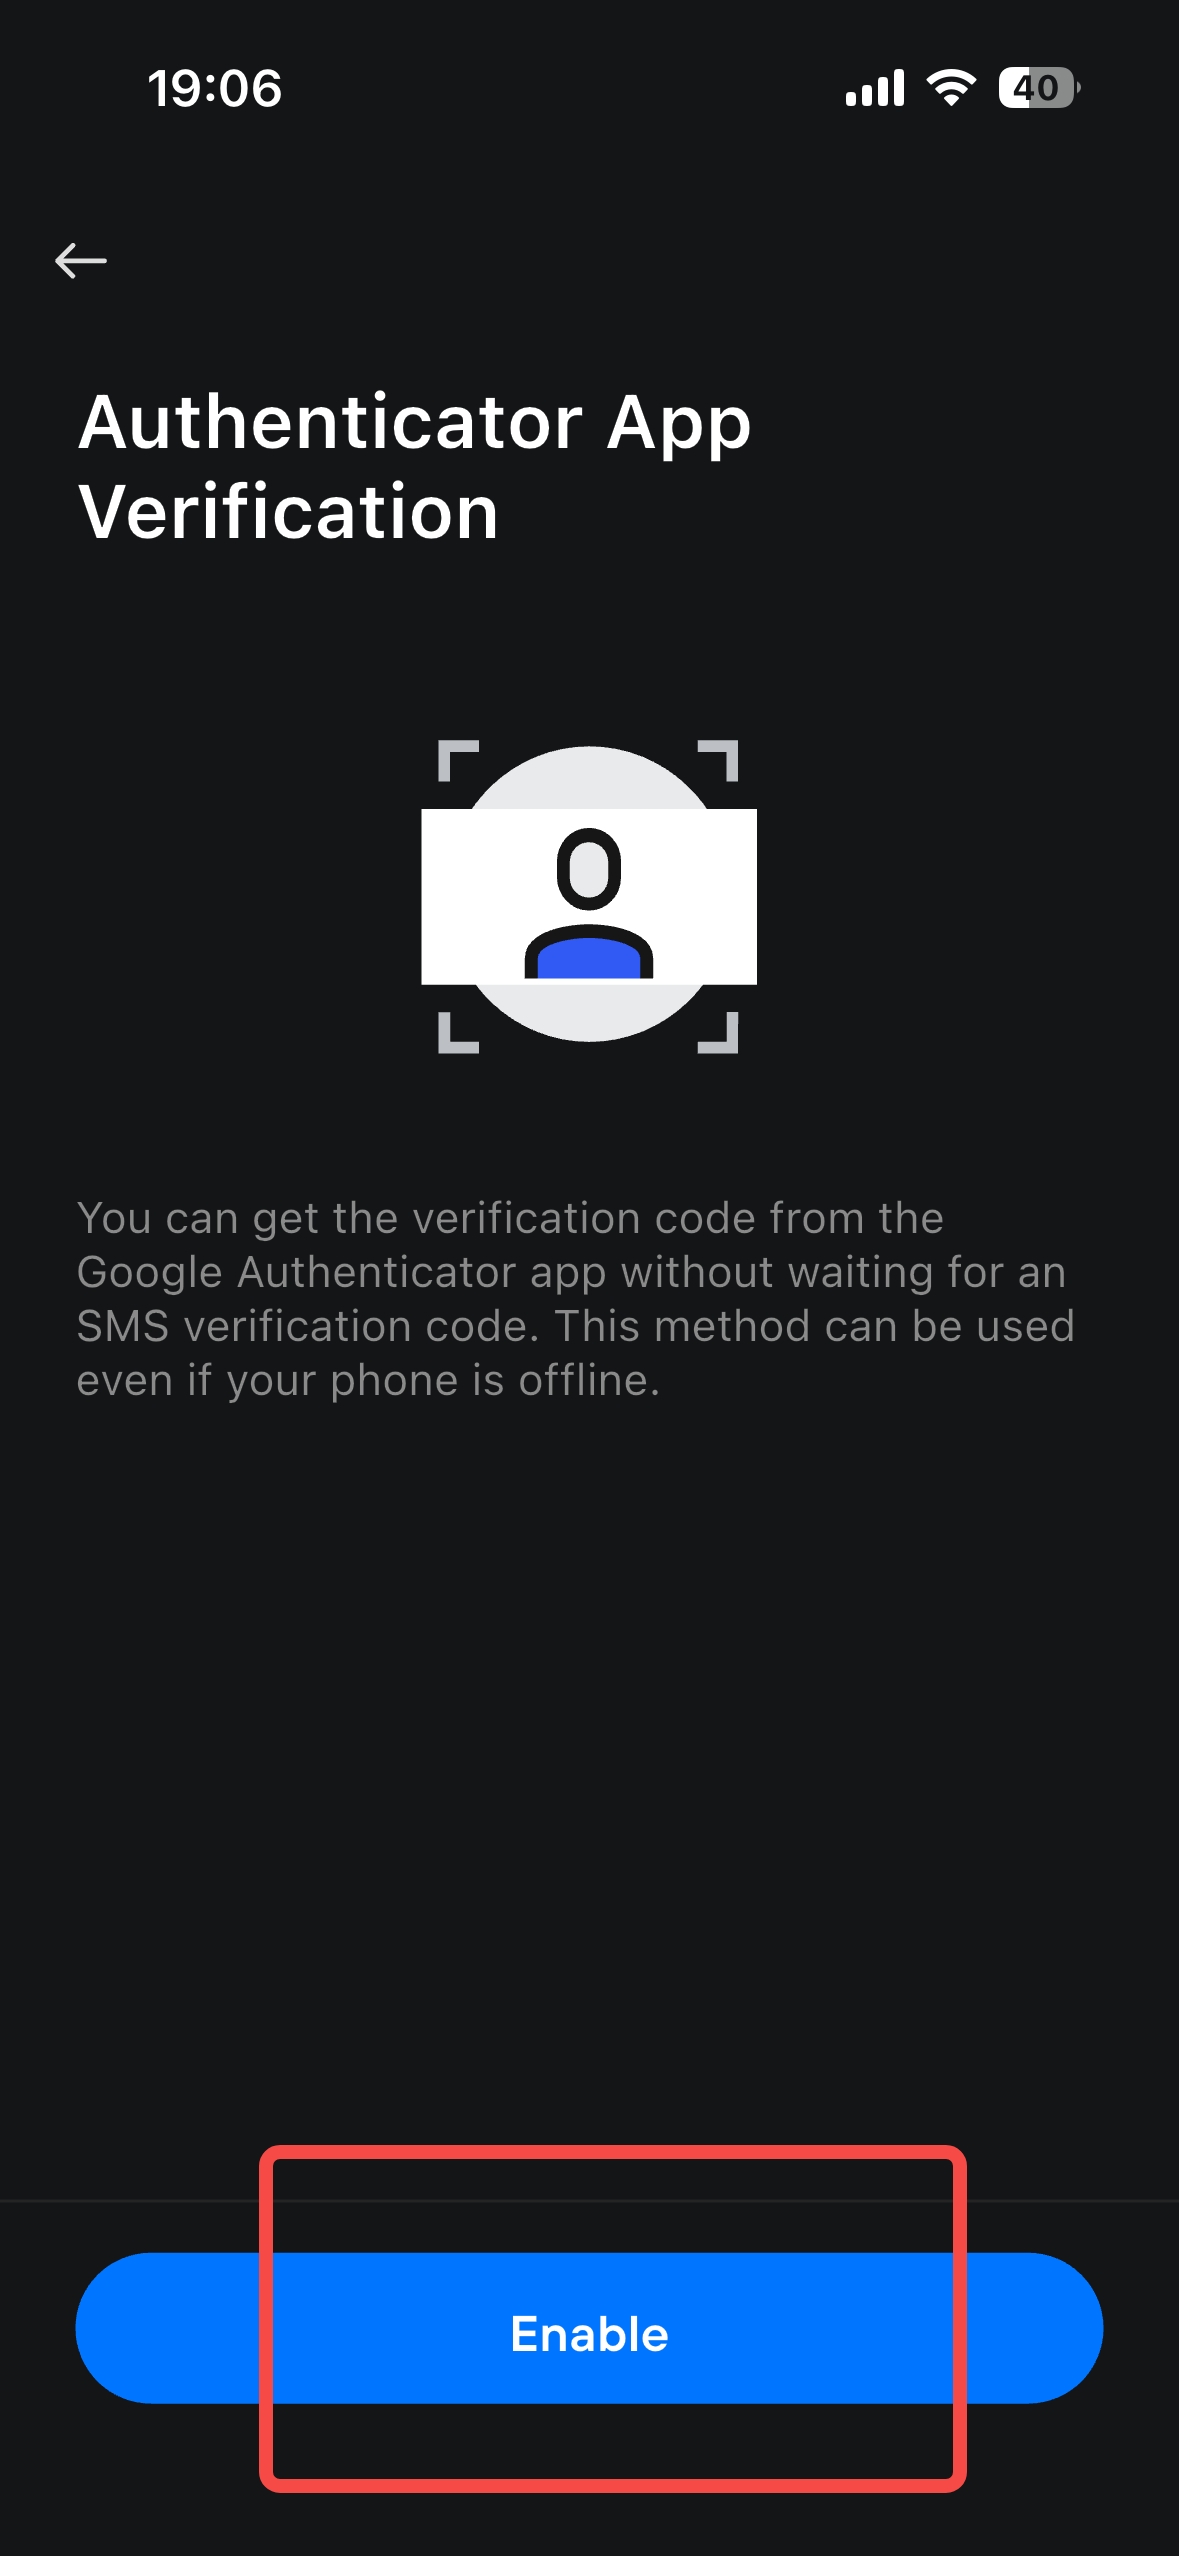
On the "Authenticator App Verification" page, you'll see the key advantages of Google Authenticator: • It does not rely on SMS verification codes, and can generate codes even when your phone is offline. • It generates a 6-digit dynamic verification code that updates every 30 seconds, offering much higher security than SMS verification. After confirming you understand, tap the blue "Enable" button at the bottom of the page to proceed with the binding process.
4. Complete the Google Authenticator Binding Process
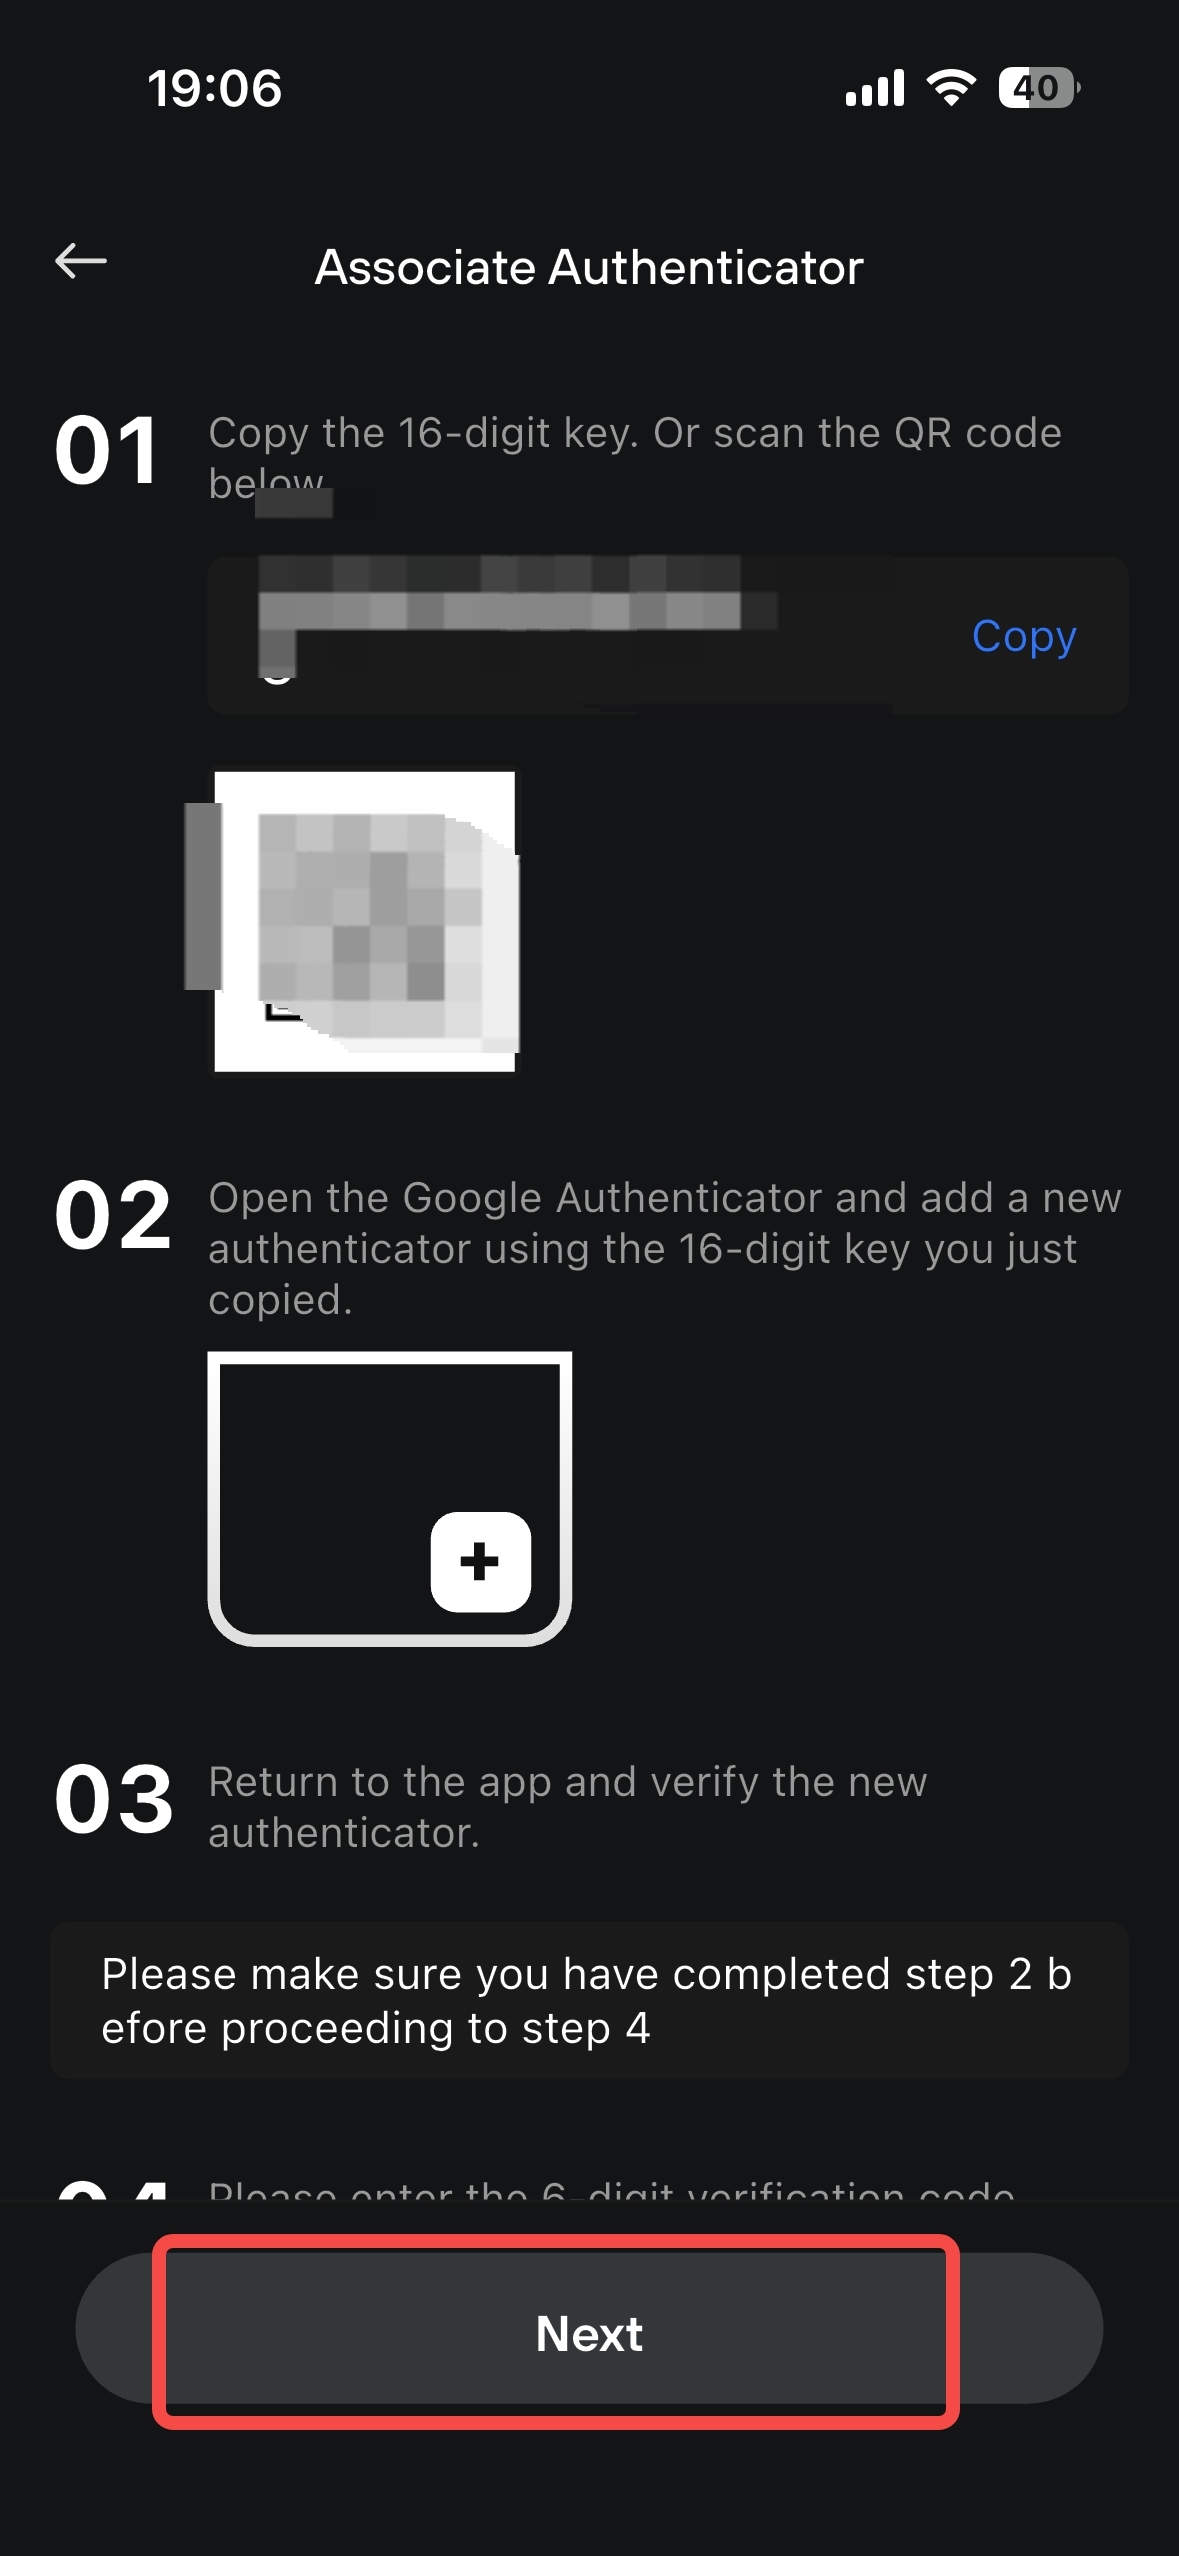
This is the key step, divided into 4 clear steps as shown in the screenshots:
Step 1: Back Up Your 16-Digit Key The page will display a 16-digit key along with a QR code. ⚠️ Important Reminder: • Be sure to copy this key and save it in a secure location (e.g., encrypted notes, offline memo). • This is your only way to recover access if you change phones or re-install the Authenticator app. Losing it may result in permanent loss of account access! You can also scan the QR code directly with the Google Authenticator app to quickly add the account.
Step 2: Add the Account in the Google Authenticator App 1. Open the Google Authenticator app on your phone (install it from the app store if you haven't already). 2. Tap the "+" icon in the app and select either "Scan a QR code" or "Enter a setup key": ◦ Scan a QR code: Point your phone camera at the QR code on the exchange page; the app will automatically add the account. ◦ Enter a setup key: Paste the 16-digit key you copied earlier, enter an account name (e.g., "XX Exchange"), and tap "Add". Once added, the app will display a 6-digit dynamic verification code that updates every 30 seconds.
Step 3: Return to the Exchange App and Enter the Verification Code Back on the exchange's binding page, enter the 6-digit code currently displayed in the Google Authenticator app into the input field for
Step 4. Note: The code refreshes every 30 seconds. Ensure you enter it while it's still valid; if it expires, you'll need to enter the new code. Step 4: Tap "Next" to Complete the Binding After confirming the code is correct, tap the "Next" button at the bottom of the page to submit the verification. Once the system verifies it, the page will show "Google Authenticator bound successfully". Your account is now protected by two-factor authentication!
5. Important Notes After Setup
1. Back up your key multiple times: In addition to the 16-digit key, save a screenshot of the QR code to an offline device. This ensures you can recover access if your phone is lost or the app is uninstalled.
2. Never share your verification code: The dynamic codes from Google Authenticator are as sensitive as your password. Never share them with anyone or enter them on unofficial platforms.
3. Unbind before changing phones: If you get a new phone, log in to the exchange on your old device first to unbind Google Authenticator, then re-bind it on your new phone to avoid being locked out of your account.
4. Enable other security features: Alongside Google Authenticator, we recommend binding your email and enabling login password protection to create multiple layers of security.
After setup, you'll need to enter the Google Authenticator code every time you log in, withdraw funds, or perform sensitive operations, effectively preventing account theft and asset loss.

Comments
0 comments
Please sign in to leave a comment.